Restoring the Model A - 2025
In September of 2025, I approached some friends of mine who had recently moved into a house with a two car garage. I asked if they had any interest in leasing the space to me for a couple of months while I worked on the car, and a couple of weeks later I moved her out of storage and into the garage that would basically become my second home for two months.
In the run-up to this restoration marathon, I managed to source a period-correct radiator that had been leak tested, tires, and a laundry list of parts that I knew I was going to have to replace from a supplier. Finding the radiator was like finding a needle in a haystack, I had been regularly checking auction sites and online listings trying to find one that was not damaged, but also not the $1,200-$1,600 price tag a modern reproduction radiator costs.
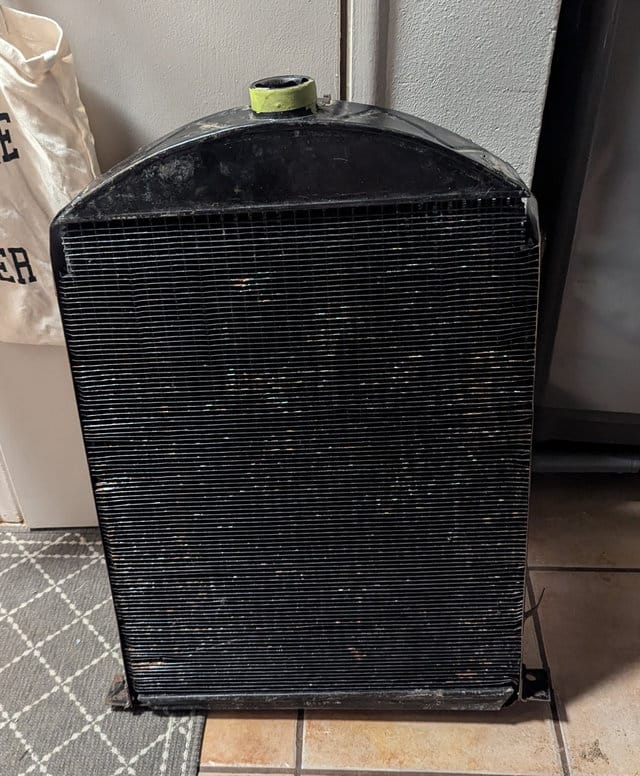
I was genuinely worried this radiator was going to have something wrong with it, and it essentially turned into a $400 gamble. It was too late now, with the radiator in Santa Fe, and numerous other parts on the way, it was time to get to work. I had to have the car out of my friend's garage space by Thanksgiving. Within the first couple of days, I had the car put up on jack stands and I had already removed the original radiator.
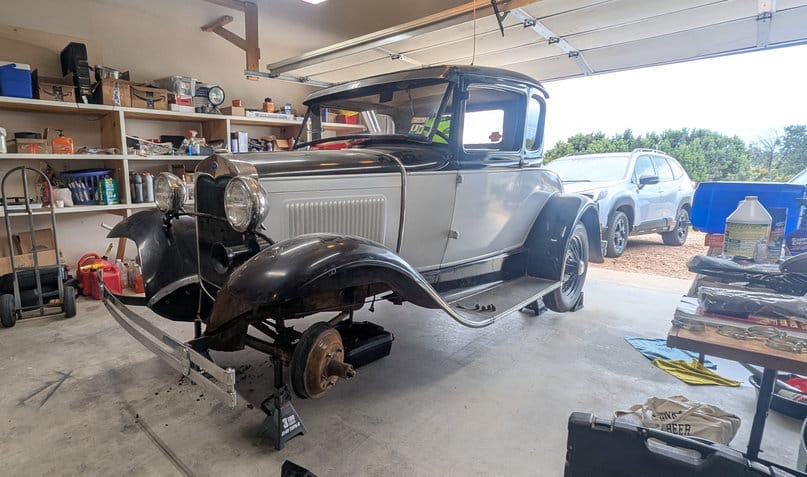
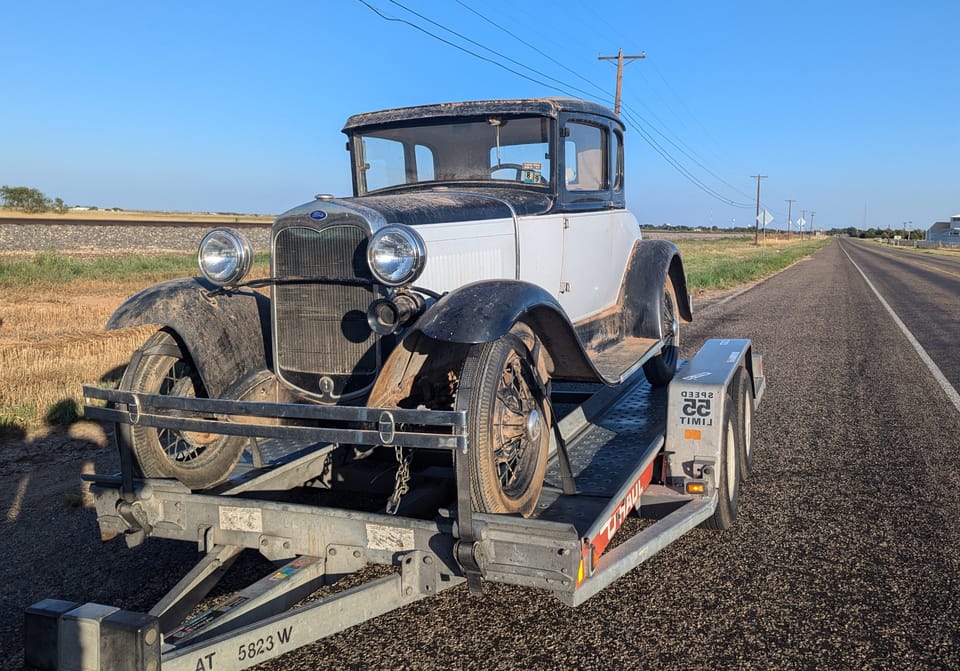
I don't think anyone has seen this car like this before.
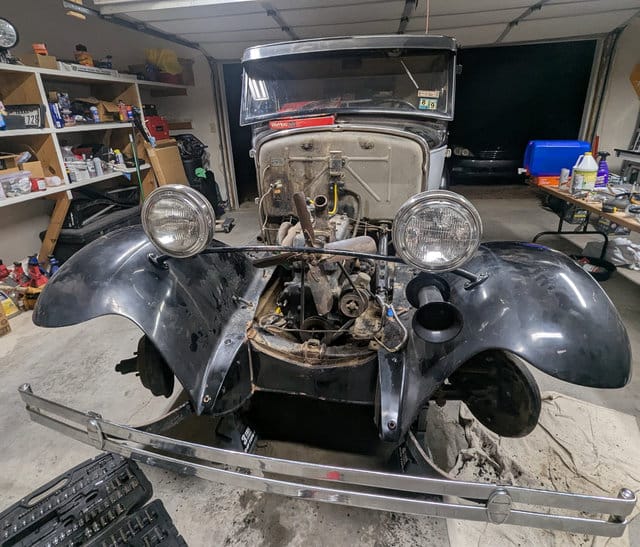
Replacing the radiator itself was going to be one of the last things I did; I had much more work to do in the engine compartment and the extra head room made things a lot easier. I had also planned on replacing the water pump and fan assembly, however my parts supplier informed me they were on back-order and I was going to have to wait.
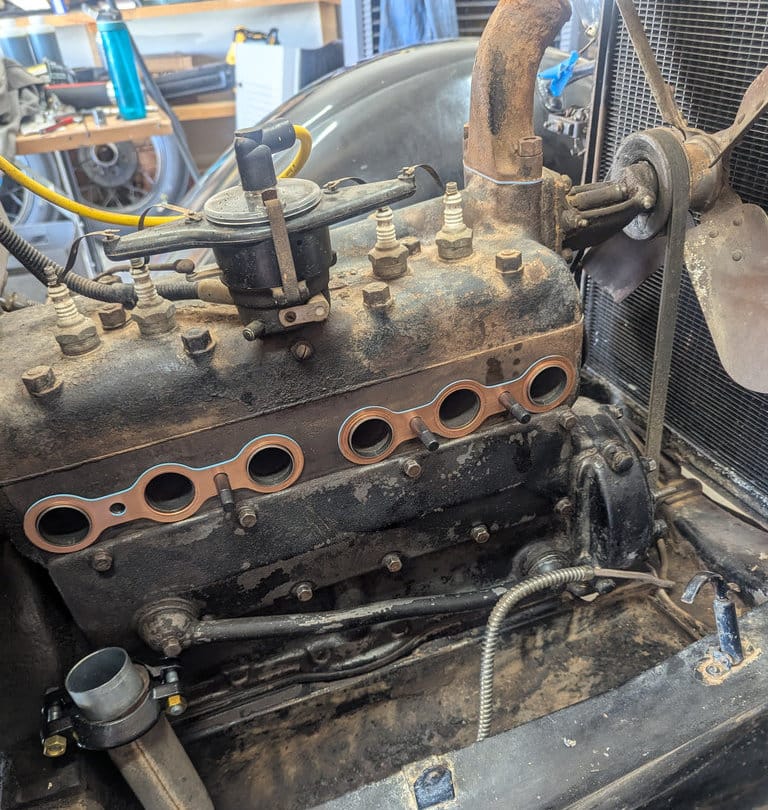
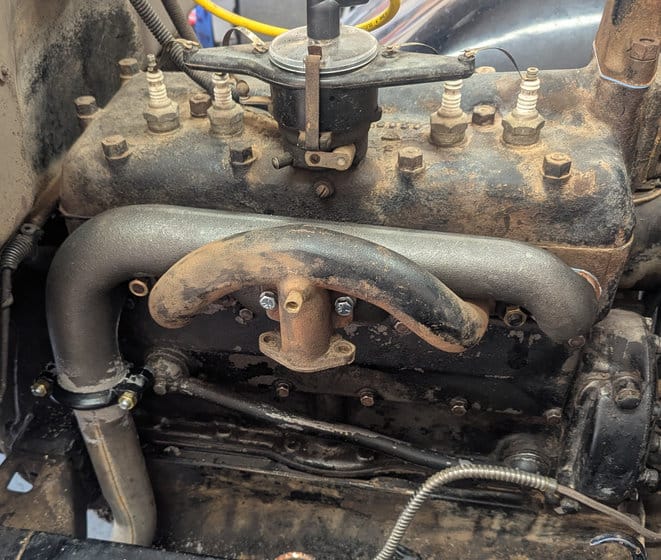
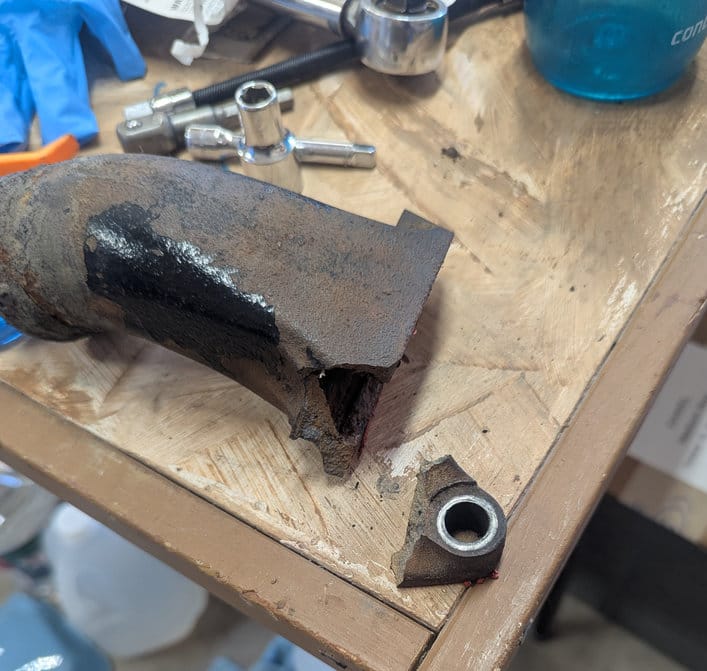
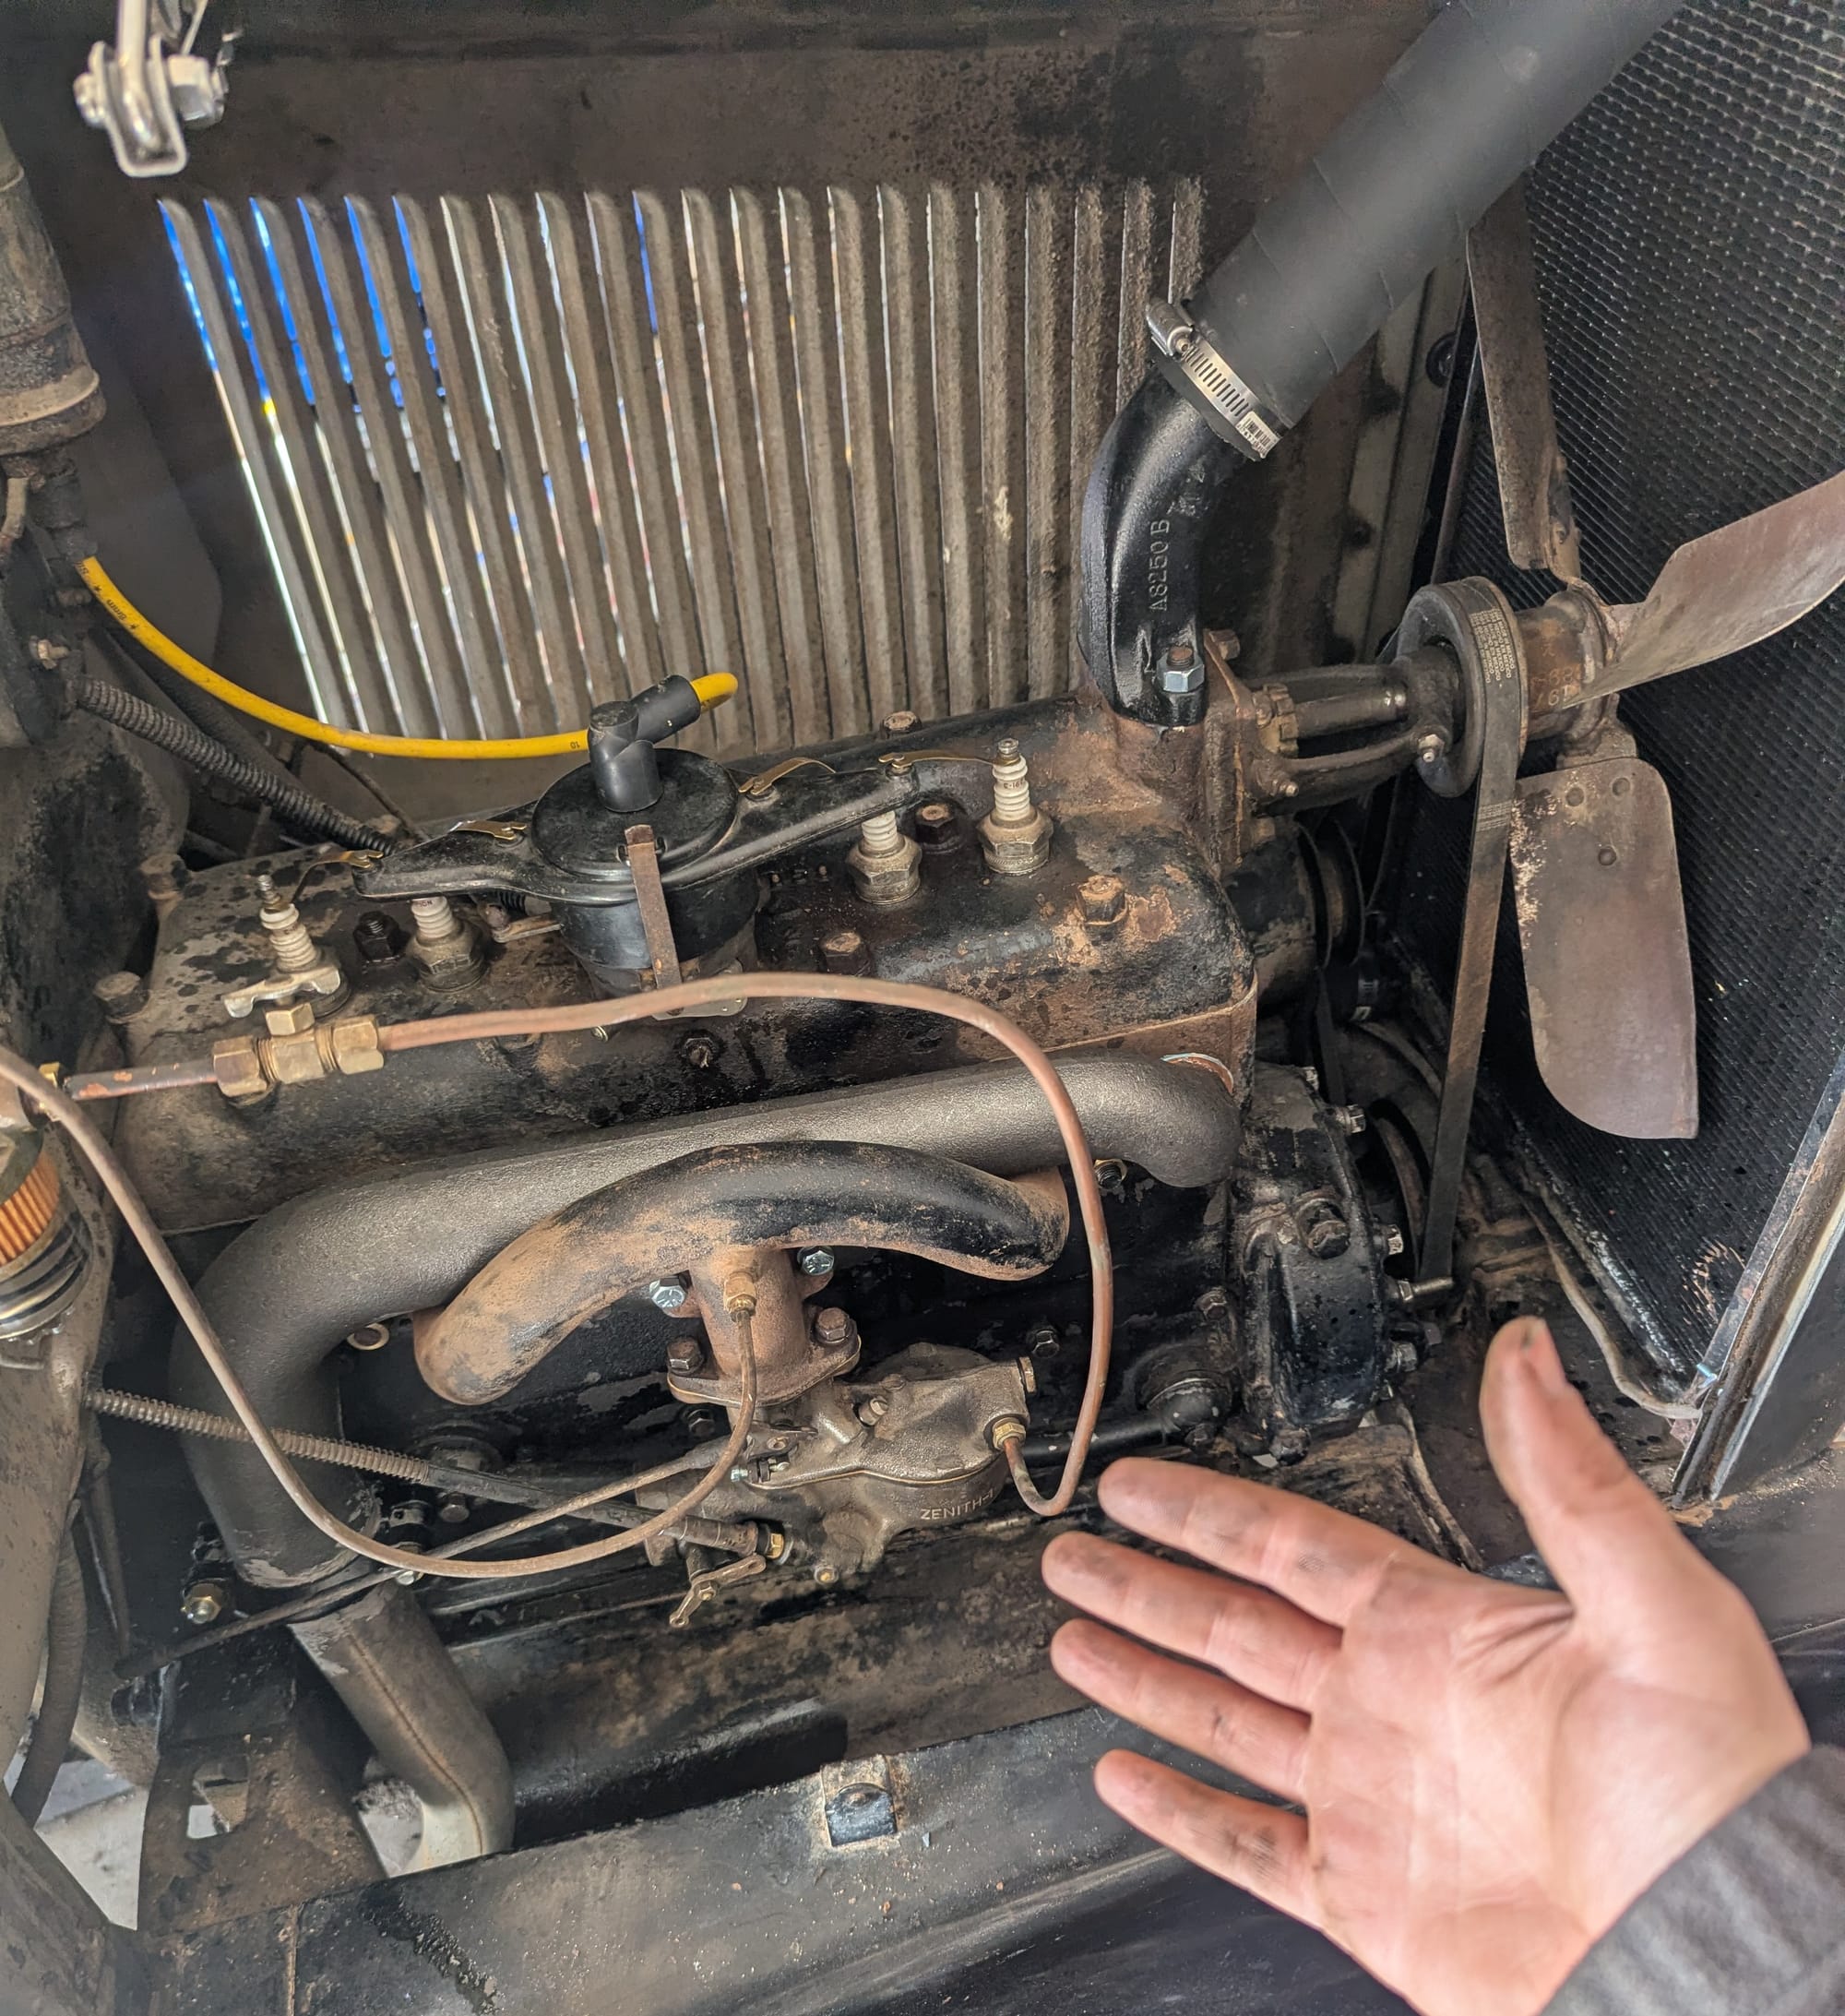
I promptly got started on removing the exhaust and intake manifolds to determine why the exhaust manifold was leaking. While cleaning the car in 2024, I had discovered a hairline crack on the exhaust manifold and knew I was going to have to replace it, but with full access to the engine block now it didn't take long to figure out how extensive the damage truly was.
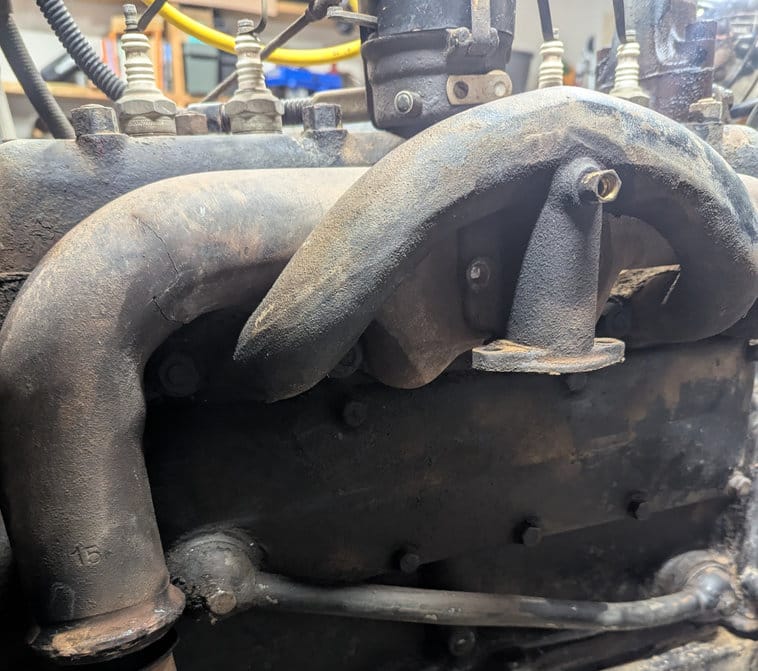
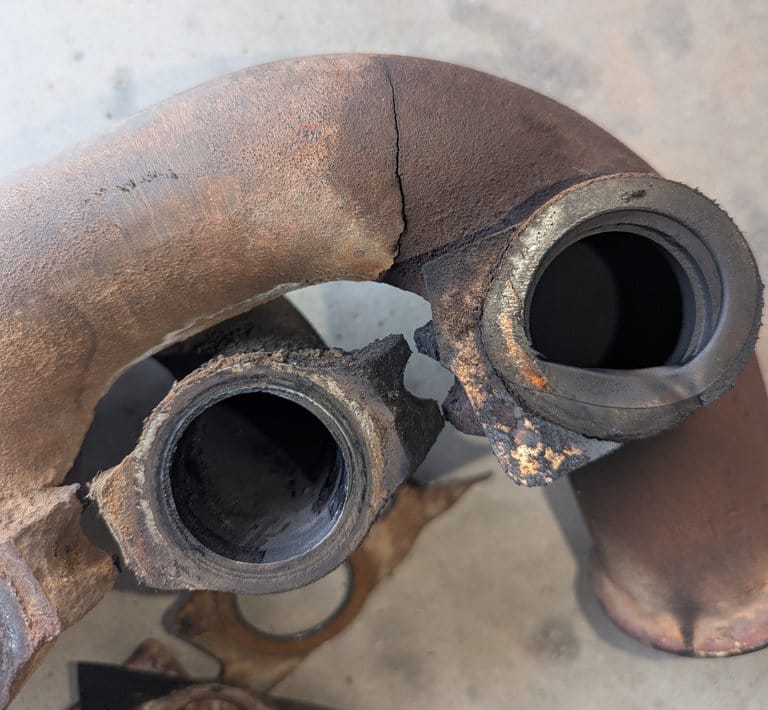
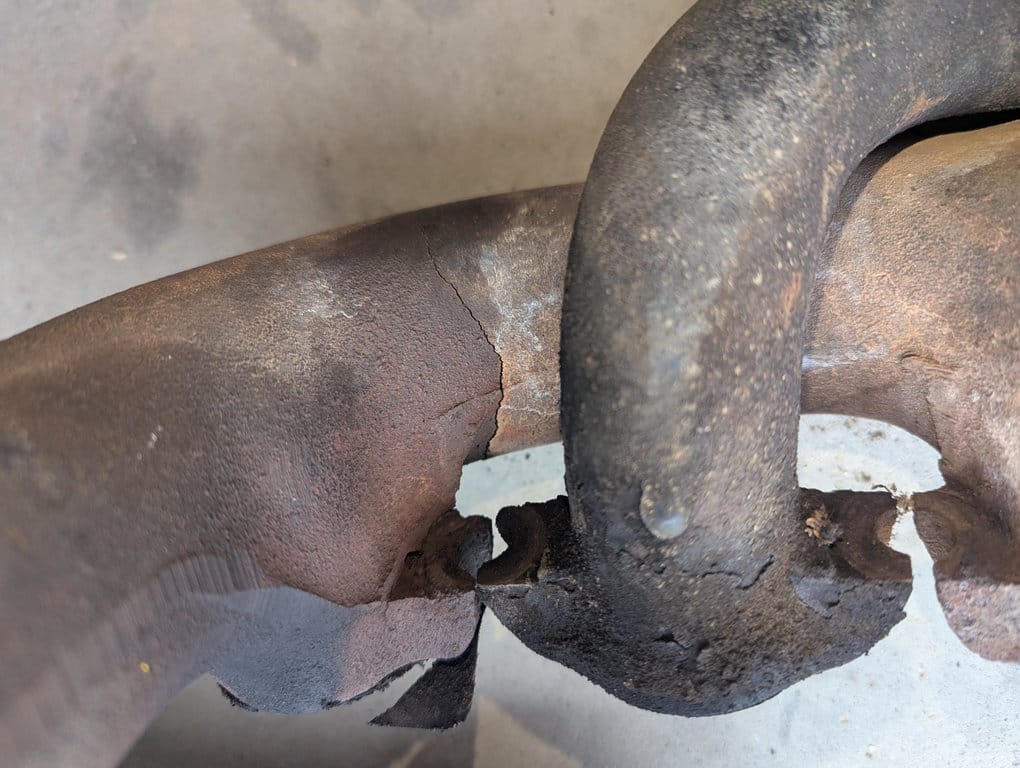

Extent of damage on old manifold, and new manifold freshly received for installation.
With full unrestricted access to this side of the engine block now, I decided to go ahead and do some more cleaning. The surface of the block was going to need to be cleaned anyway so that the new manifold would seal correctly. I also decided to try and remove some of the corrosion on the water return pipe, a decision that would come back to haunt me later.
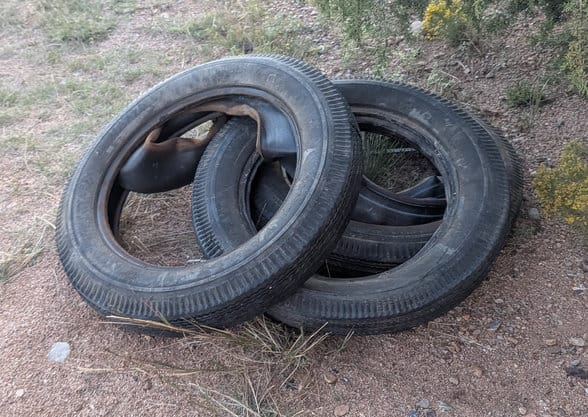
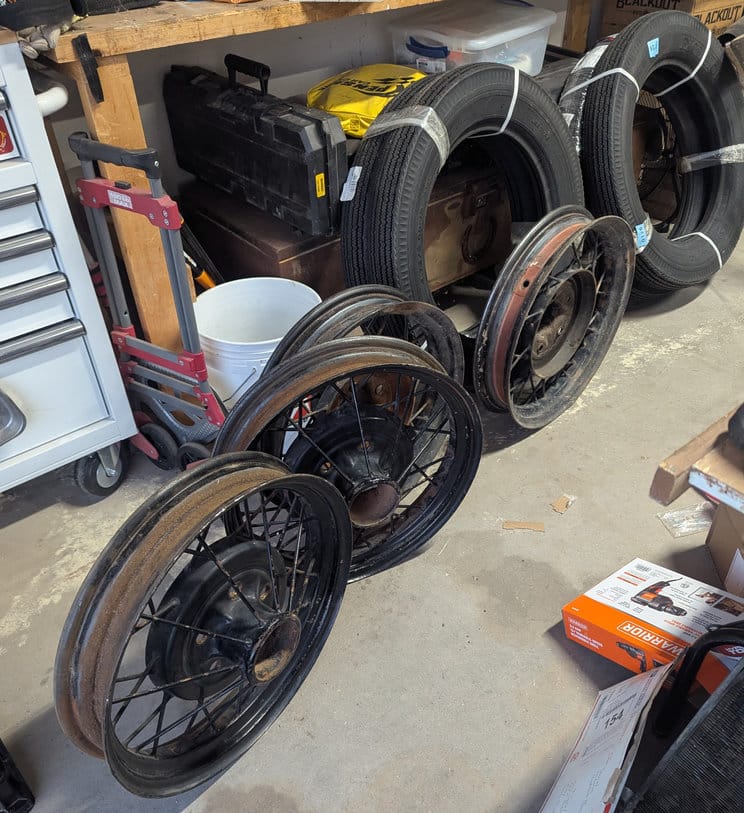
Some of the nuts were seized on the bolt studs that the manifold mounted onto, so I placed an additional order and waited on more parts to come in. My new tires had just arrived, and it was time to get started on replacing them.
The research I did warned me not to take the wheels to a tire shop, as modern tire changing equipment can damage the rims. My best bet for replacing the tires was to do everything manually, one tire at a time, pouring every ounce of leverage I could into getting these 40-70 year old tires off of the rims. Rubber at this age gets very stiff, and I quickly found myself in the worst part of this entire project.
I. Hate. Old. Tires.
I never want to have to do this again with old tires.
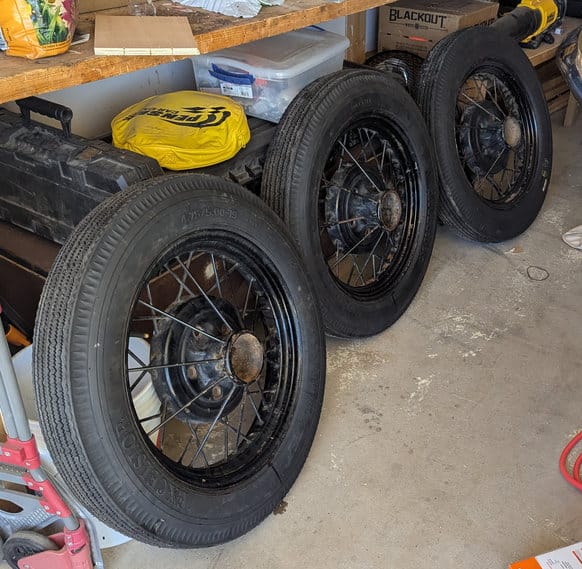
The rims had a bit of rust in them, so I sanded out as much as I could and then applied new rim-liners into the rims. Then started the equally difficult process of mounting the new tires on the rims. Thankfully the newer rubber was a lot more flexible, but it was still a process and left me sore for a couple of days after finishing this part of the job. In the process, I accidentally pinched one new tube between the tire and rim, and broke it. Welp, time to order more parts...
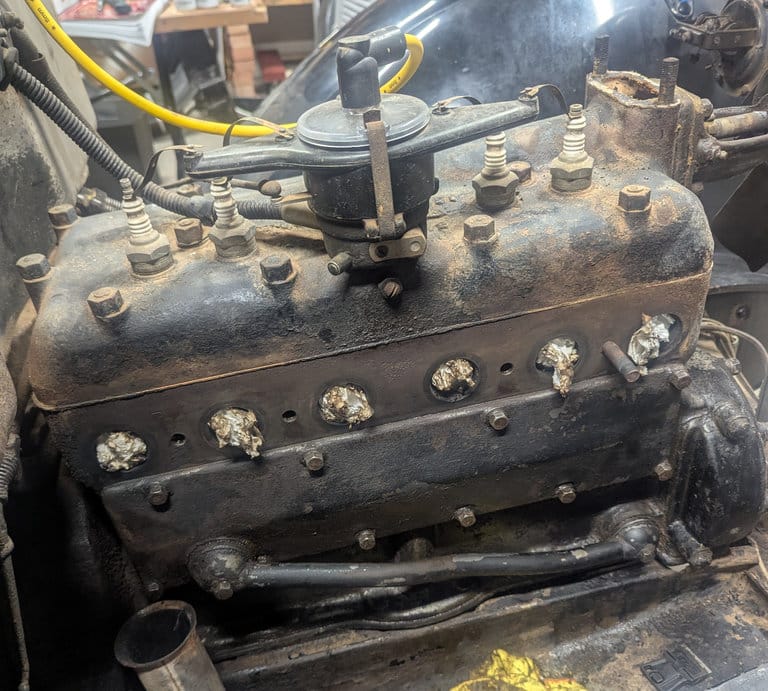
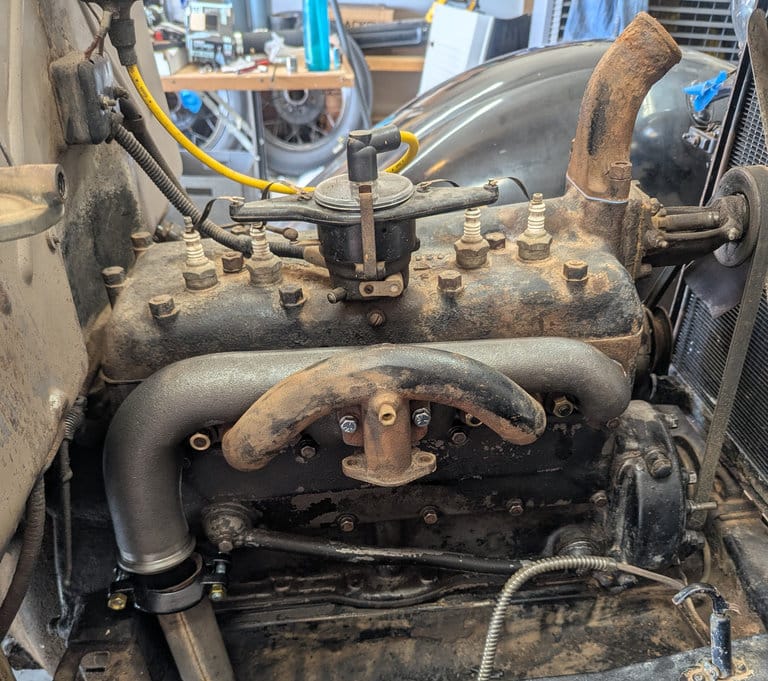
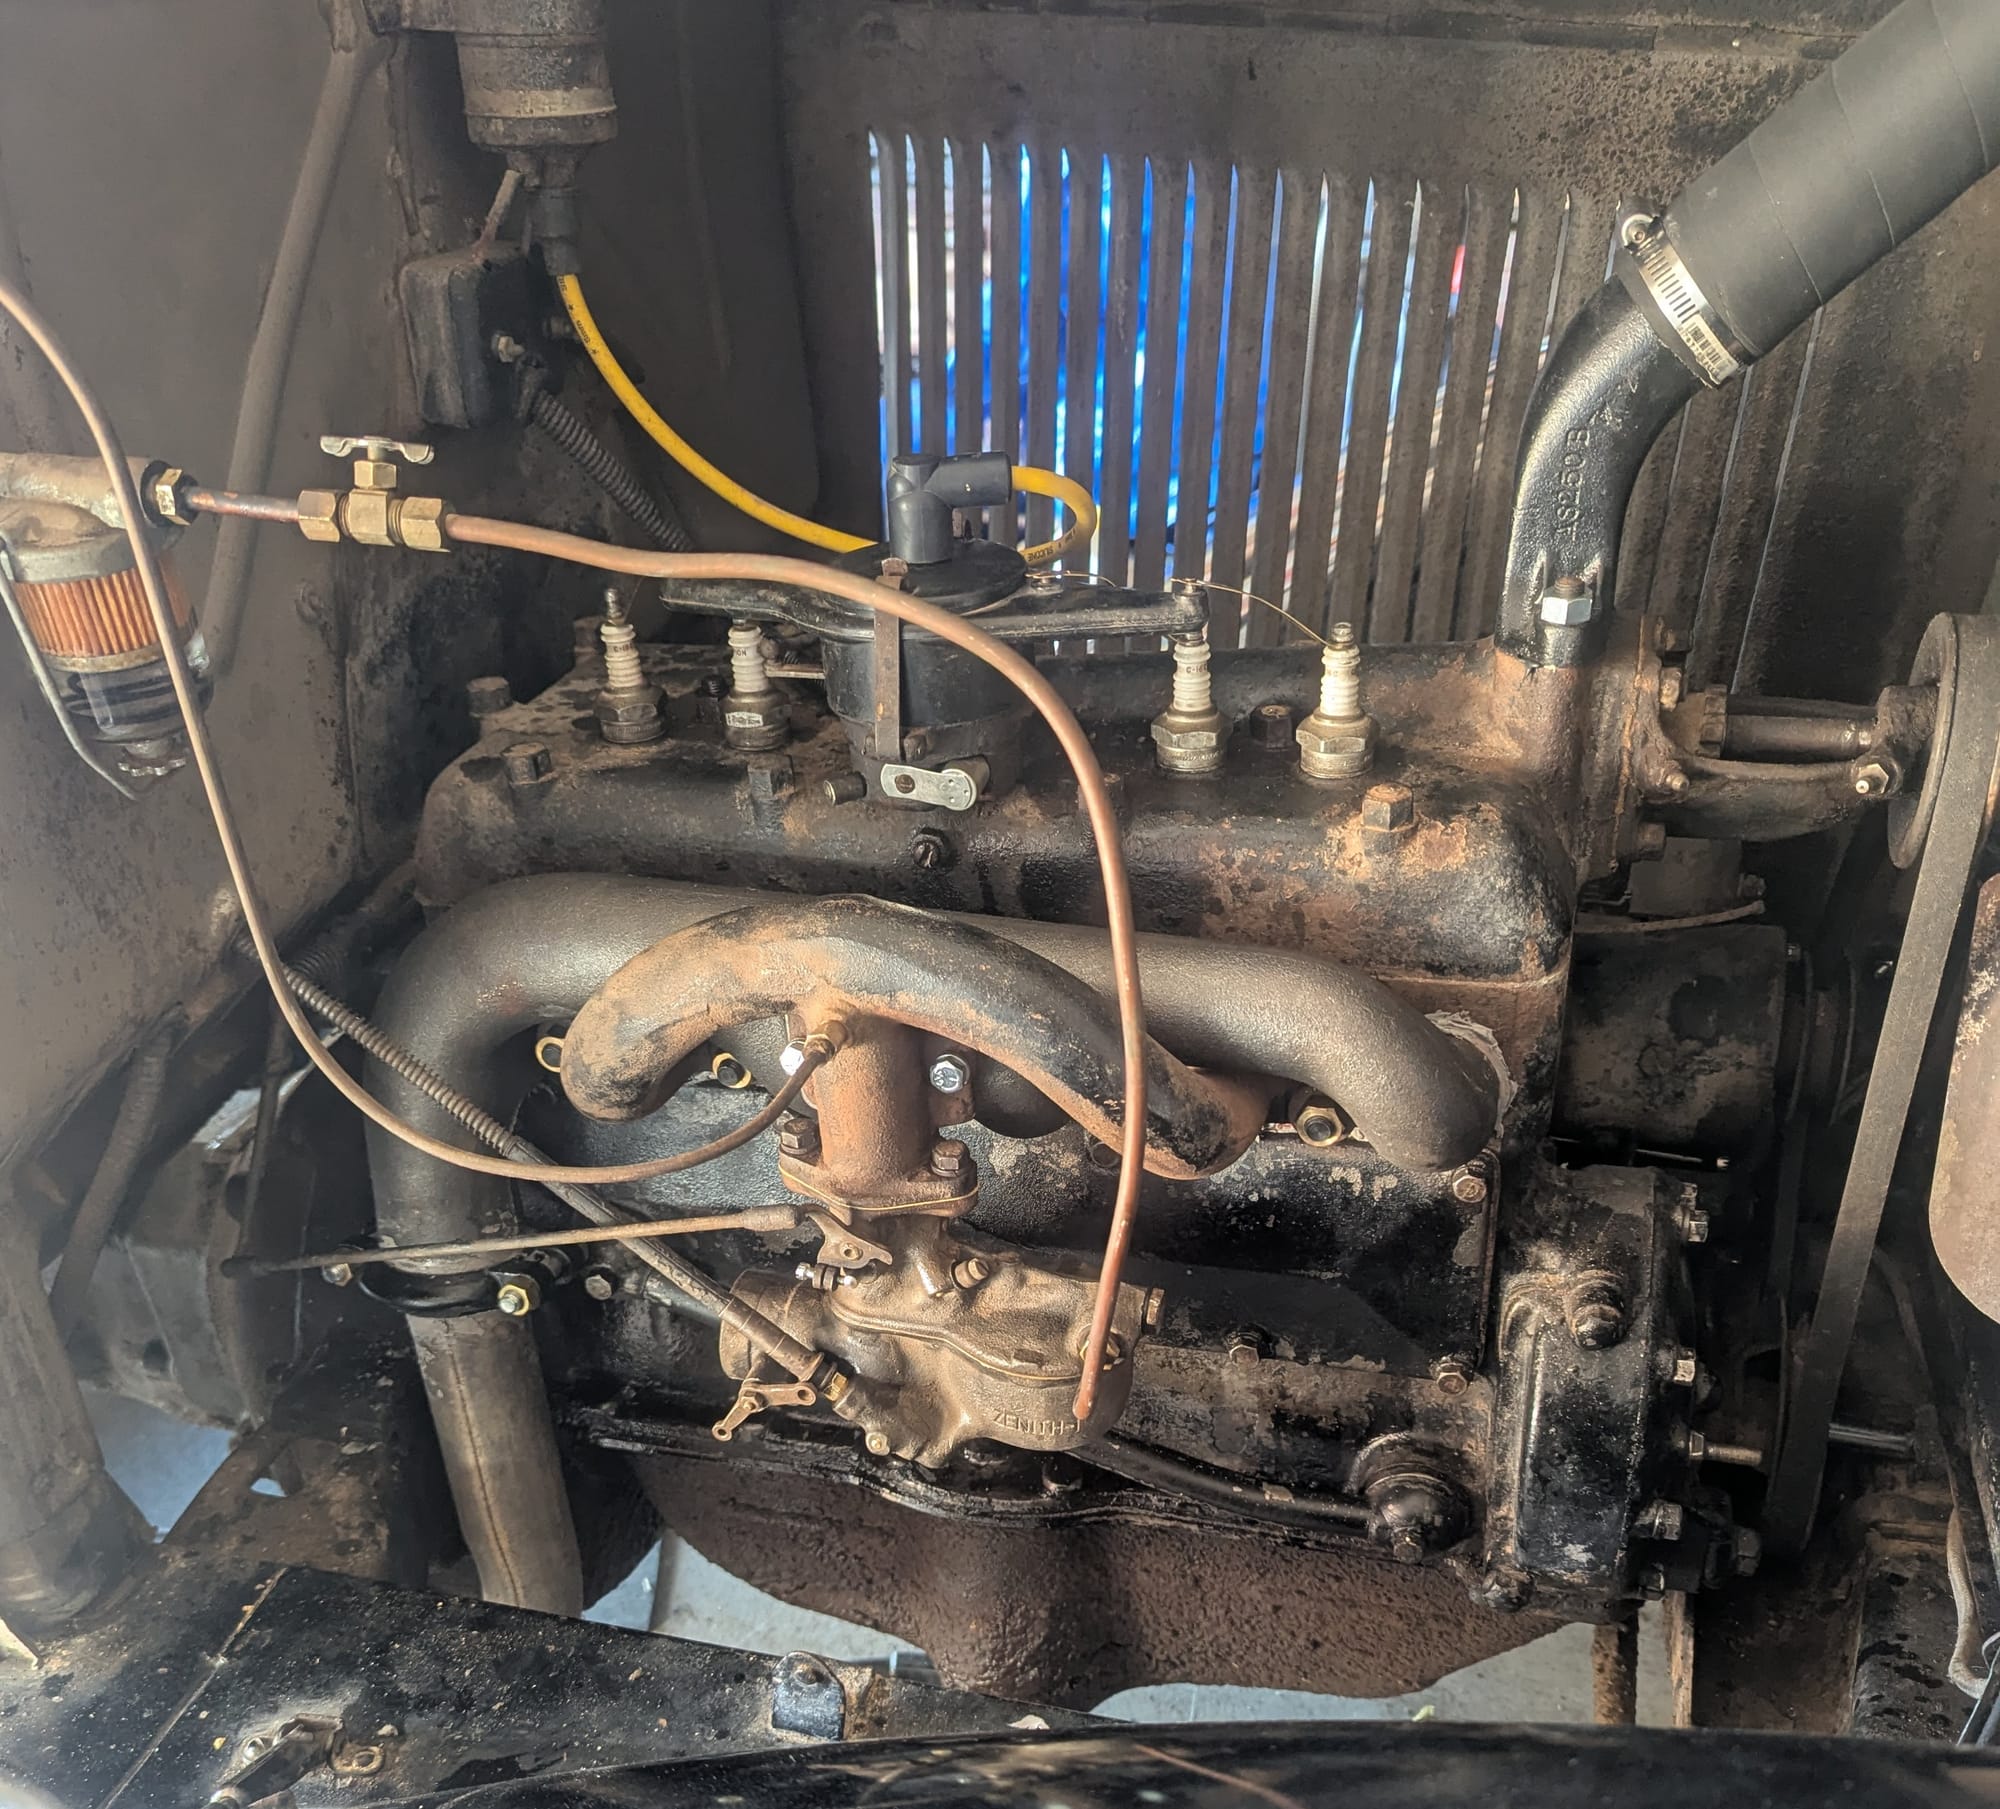
By now, the parts I needed to finish the engine bay had come in. I installed the new radiator, reinstalled the manifolds and carburetor, reinstalled the water return pipe, and put my new radiator hoses on.

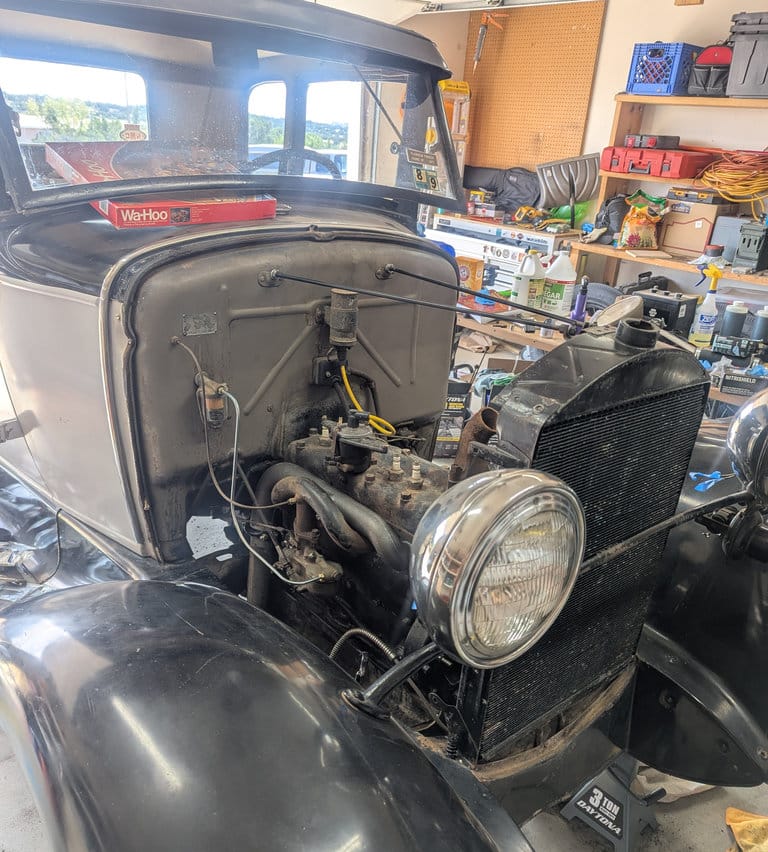
Then followed the tires, the radiator housing, and the hood of the car. She was starting to look really good and ready to go. Now I just needed to wait 24 hours for the silicone RTV to cure and I could do a proper leak test on the radiator system.

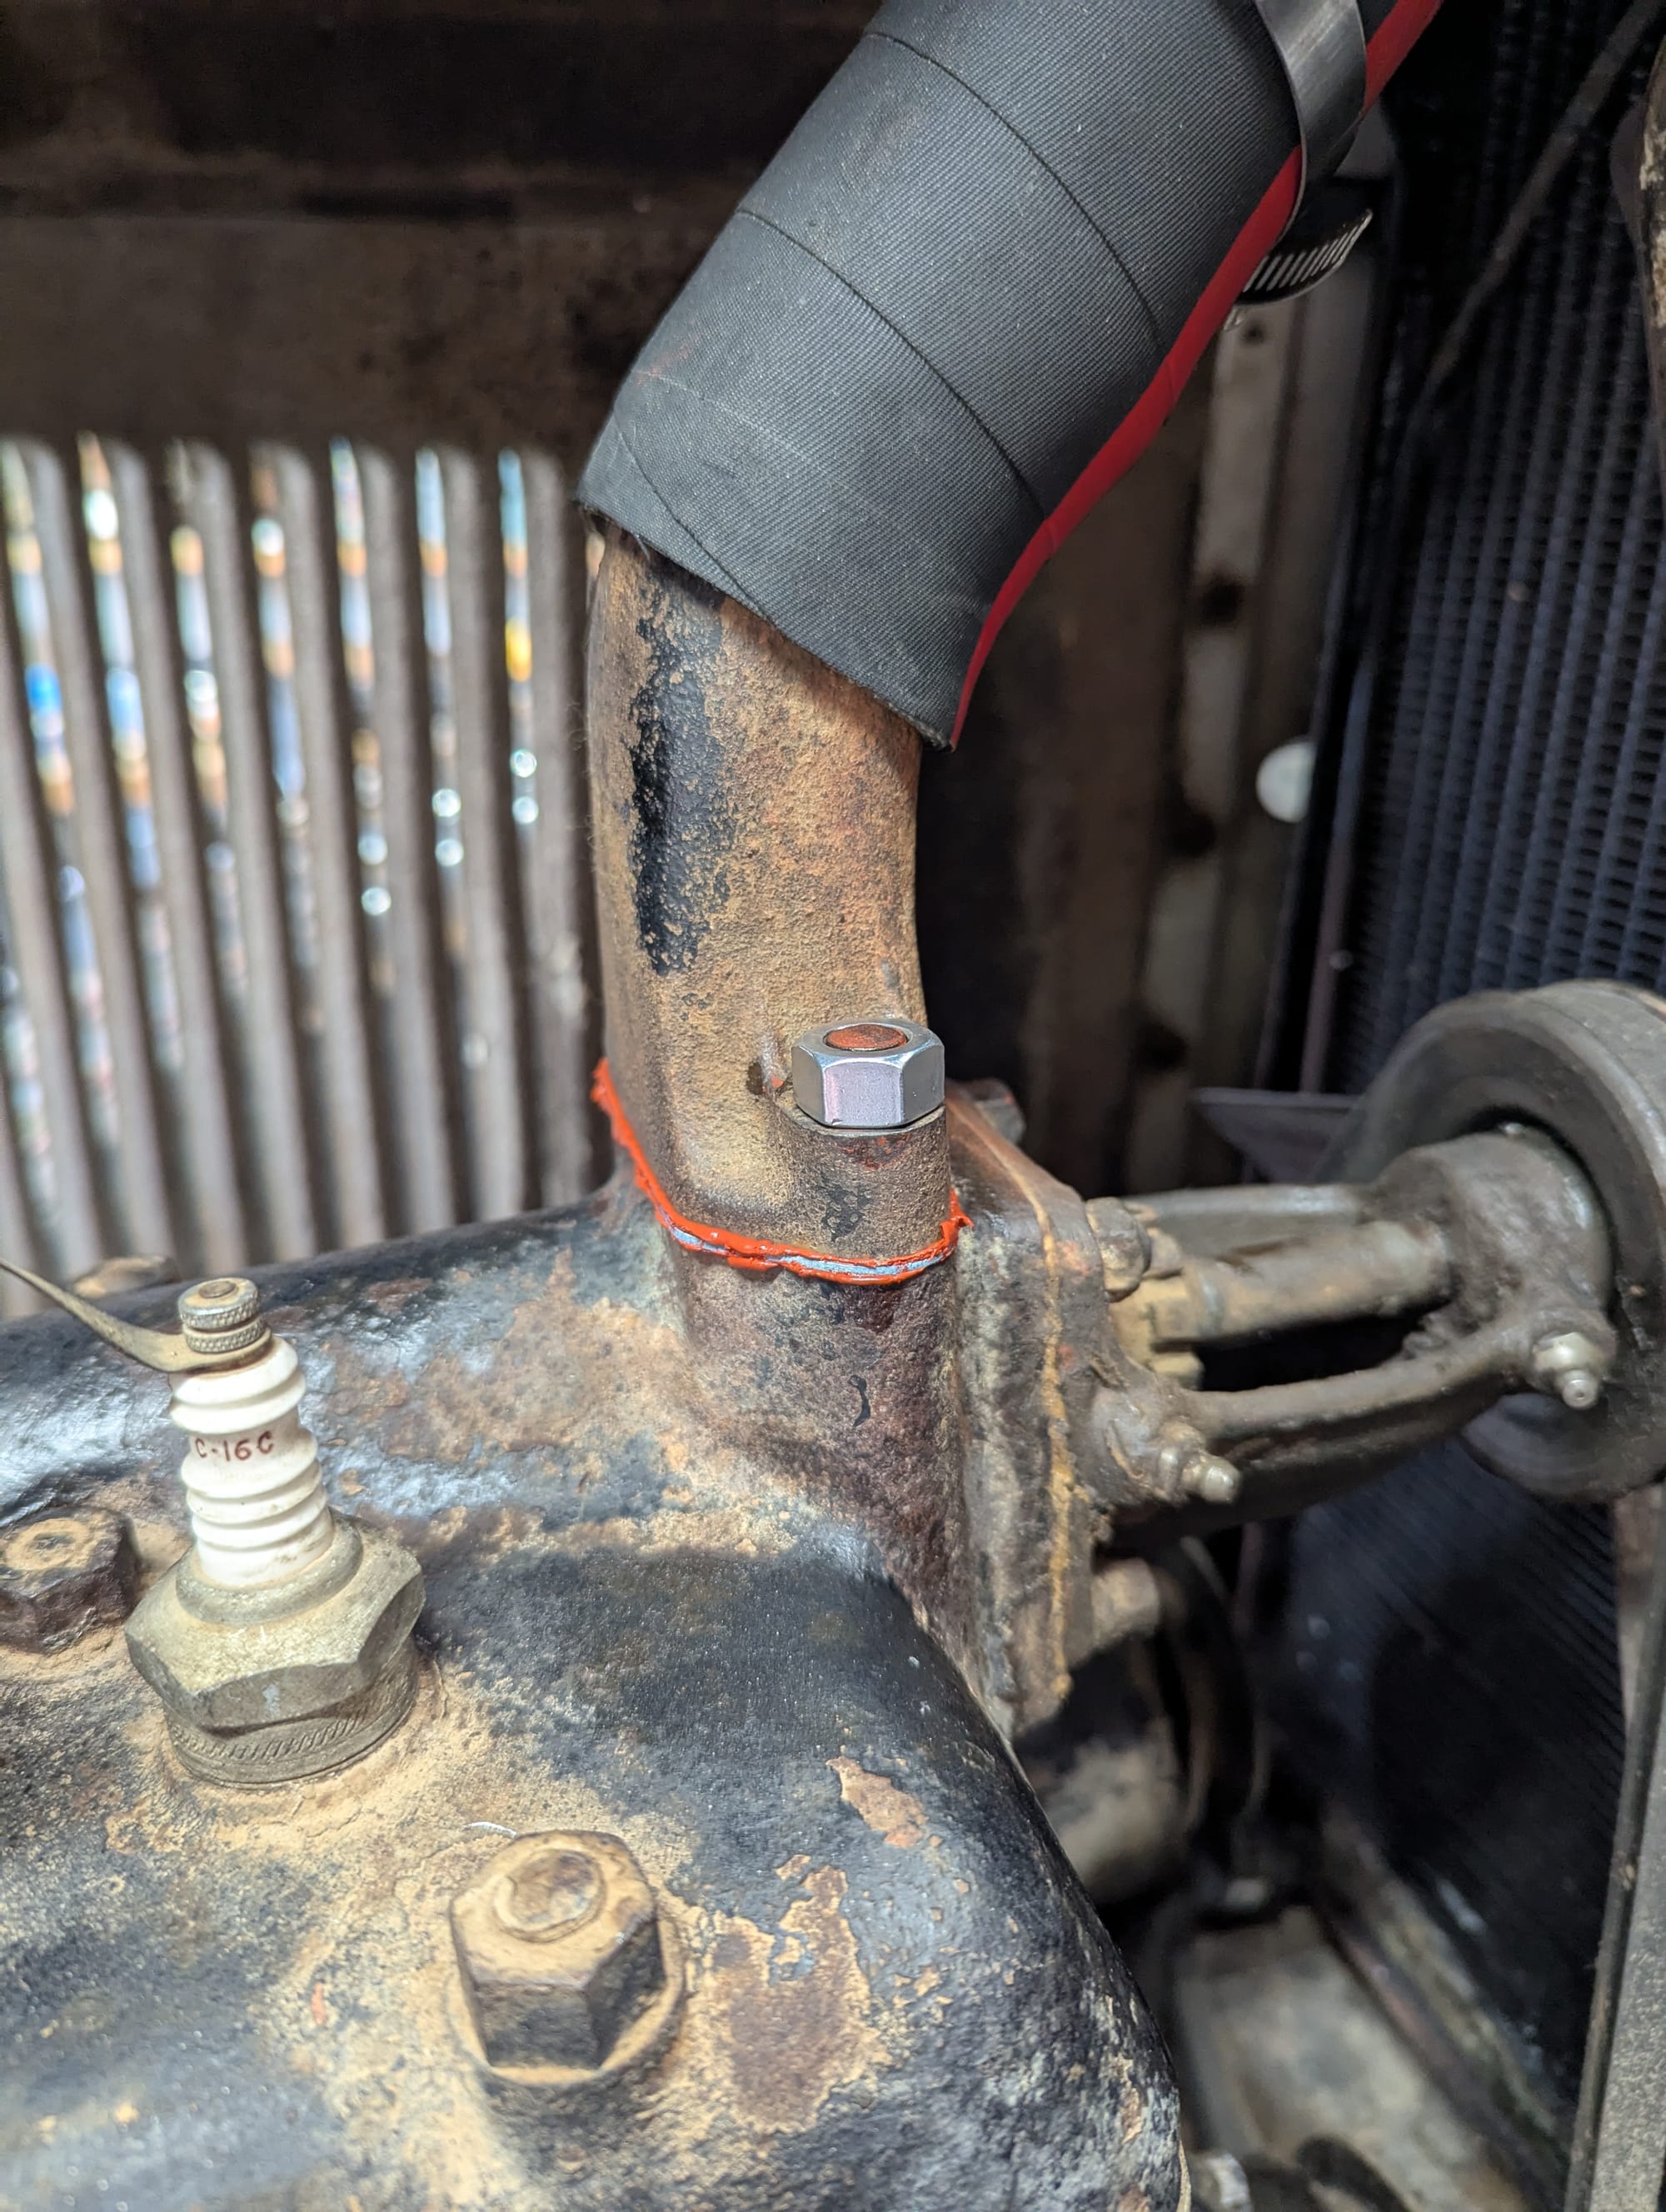
I returned the next day, and started filling the car up with coolant to test, and disaster struck. Liquid started pouring out underneath the car. I quickly popped the hood, started draining the system, and discovered the water return pipe had cracked on the block. Despite carefully torquing it down evenly, and all of the warnings I had read about this part breaking during re-install, it happened to me.
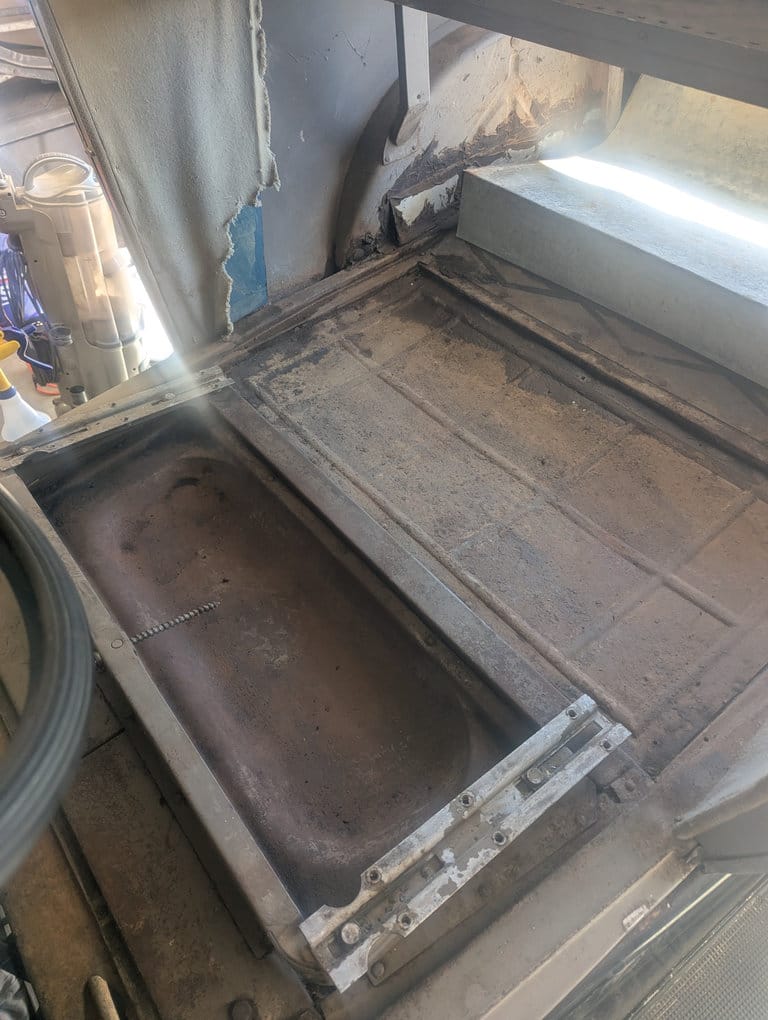
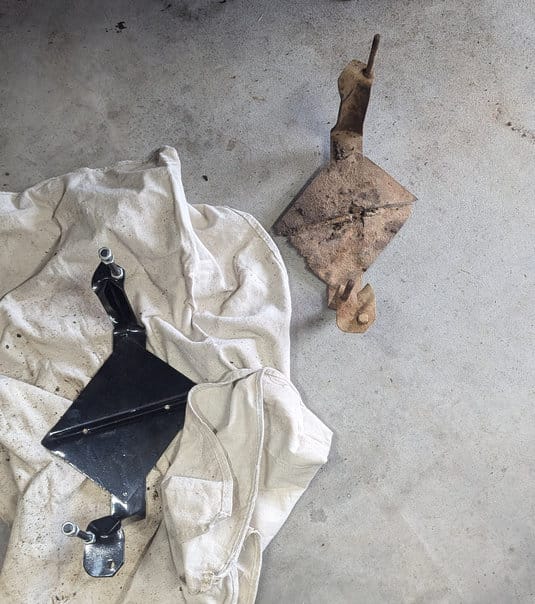
I ordered a new water return pipe, and waited. And waited. And waited. My supplier was having difficulty sourcing one. With three weeks left with the garage space, I got impatient and found another supplier and quickly placed the order. While waiting for this to come in, I tried to repair the original pipe but it did not work. I also took the time to remove the seat, clean the interior thoroughly, and install the new battery bracket under the car.
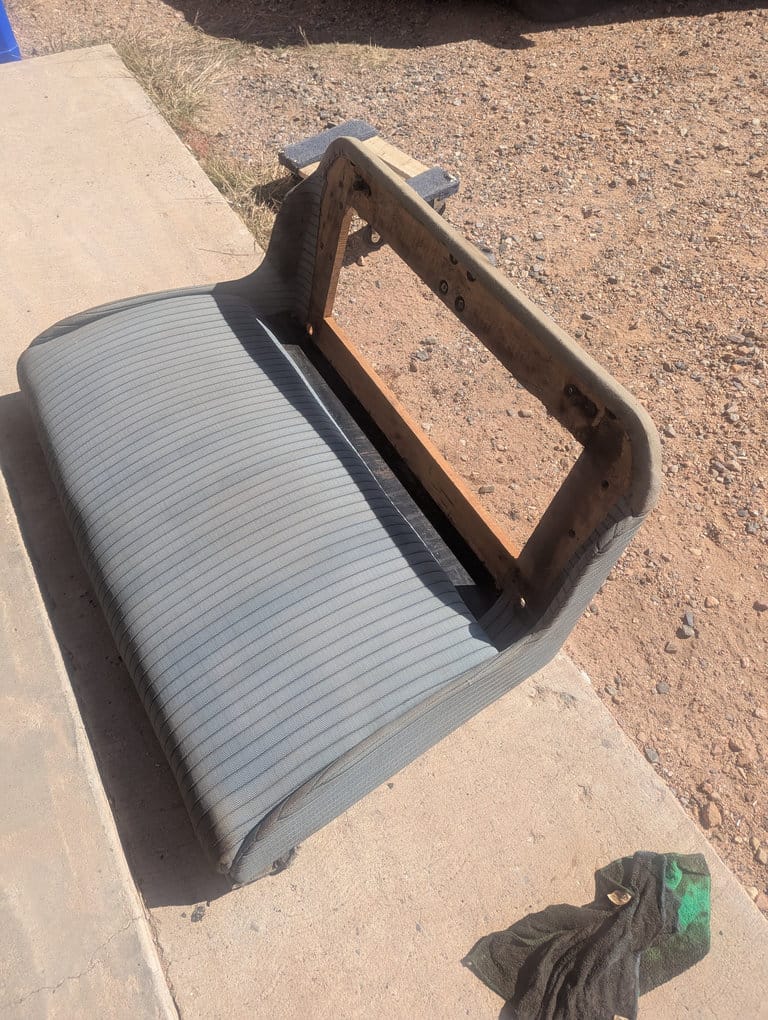


The before photos don't do justice for just how gag-worthy the interior was.
I must have gone through six bottles of animal odor remover, and the interior got cleaned multiple times while the seat was out. I gave the interior body some much needed cleaning as well, and it started to seem like the "barn smell" may actually have a chance of dissipating. Only time will tell on this one!
With two weeks to go, the new water return pipe came in. I also discovered a method involving matchsticks placed under the "wings" of the return pipe to prevent the new one from cracking. I couldn't afford any more delays. With everything re-assembled, I waited another 24 hours and performed my leak test, and everything was successful.
However, after all this work the car was having difficulty running. She'd turn over, run roughly for 20-45 seconds, and then die. My friends were watching, and noticed that the carburetor was regularly spitting fuel out of the intake.
What followed was a mad rush of a week of troubleshooting; multiple carburetor rebuilds, tuning and trying to get the fuel level just right, compression checking the cylinders, trying to clean intake/exhaust valves without removing the engine head, checking valve timings and spacing, re-timing the engine, rebuilding the distributor, checking the manifolds for leaks, removing and reinstalling the manifolds, basically anything that could impact the successful combustion of fuel inside of the engine block.
All to no avail.
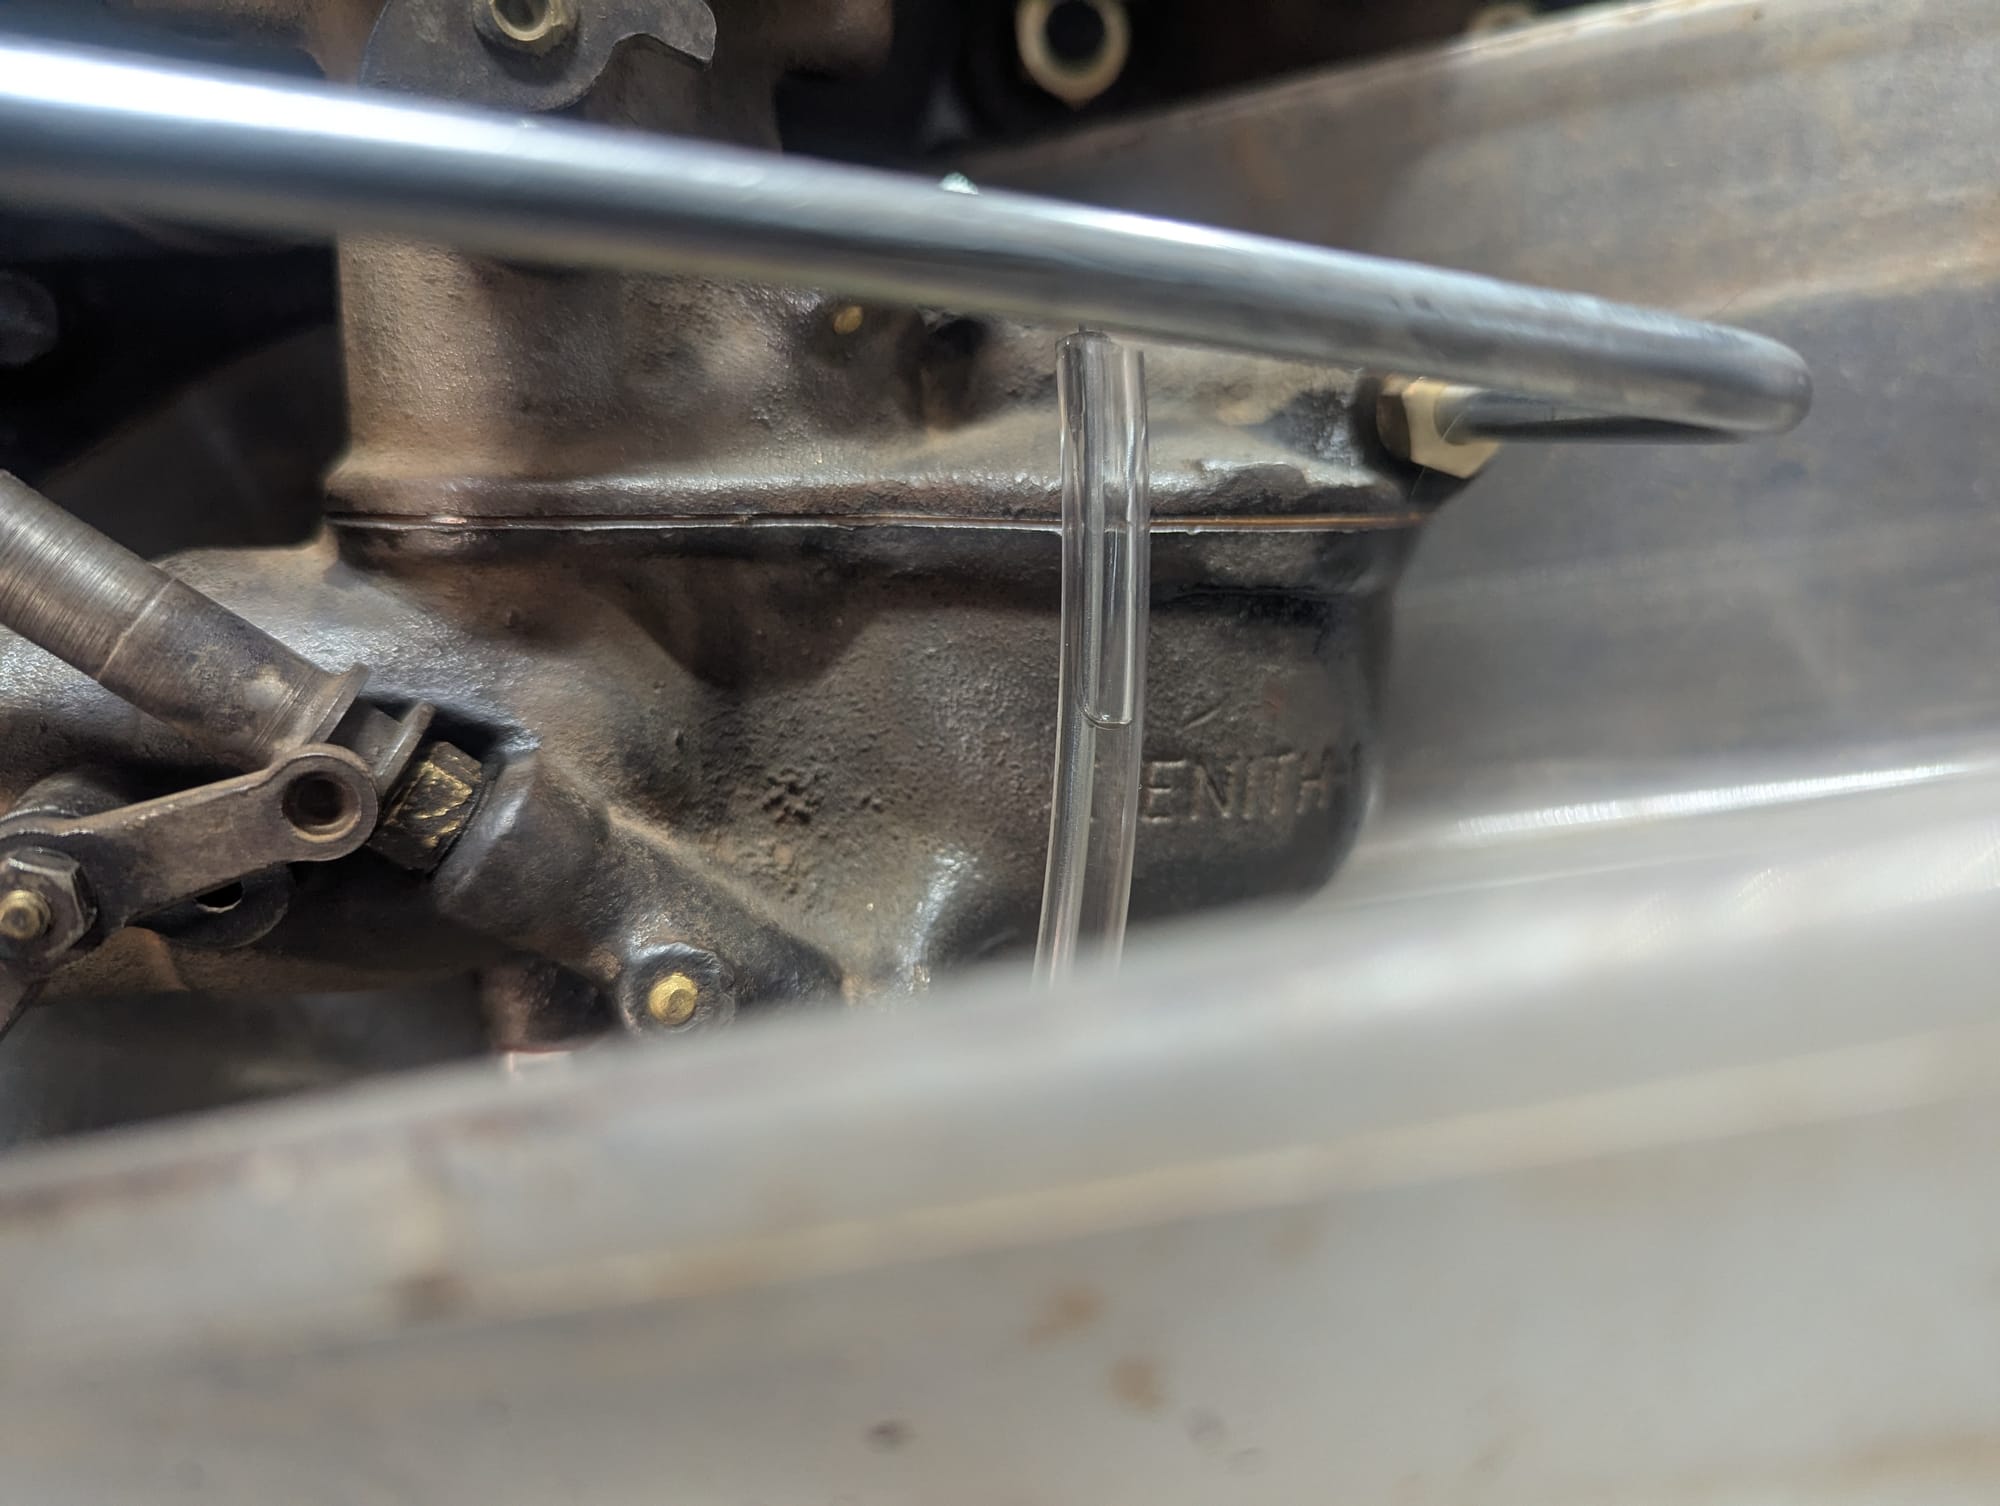
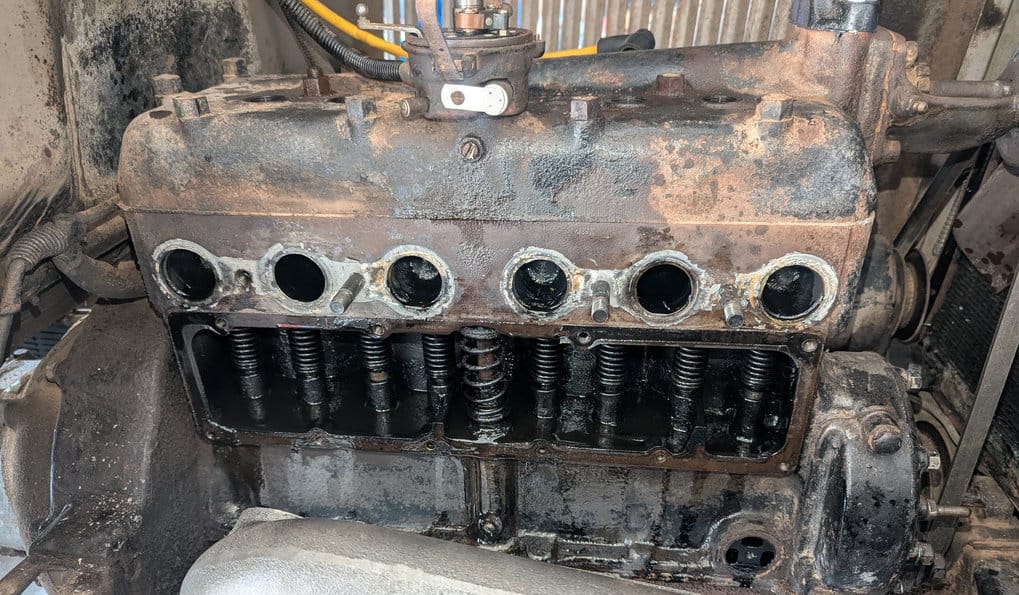
Carburetor Bowl Fuel Level Check; Valve timing, spacing, and closing checks; final re-assembly.
The basic thought process was, either fuel is not igniting in the chamber when the spark hits the cylinder, an exhaust valve wasn't closing all the way, or the fuel mixture was just way too rich. Unfortunately, after all this last minute work, the symptoms persisted and in the following video you can still see gas coming out of the carburetor and even a small blow back of exhaust as the engine stalls.
Out of time, money, and ultimately energy, it was time to put the project to rest for the season. I moved the car back into storage and for the first time in two months actually got some decent rest. Working the day job to then turn around and turn wrenches for most of the night was starting to get to me.
Unfortunately, I'm also out of funds for the time being. We ultimately decided that I'd need to lap the valves, which involves removing the head off of the engine. A few days work to do this, and a lot more involved than I want at the moment. I may also need to replace the carburetor, or have it professionally refurbished. That's $350-600 right there.
What is good news, is a massive amount of much needed work was done on the car. In between turning wrenches and screwdrivers, I was also continuing to clean the chassis of the car and remove yet more of the caked on grease and dirt of days gone by.
I'm planning on revisiting this project in the summer of 2026. By that time I will have most of my debts paid off, and have the funds to finish this up. For now, Doc Estelle sits in storage and continues to wait to make her debut again.